When it comes to automating the process of buying crypto, the Killshot bot is one of the best available on the market. However, using this tool can be a bit challenging for those new to the crypto space. That’s why today, we’re going to guide you through the process of changing the buy settings for the Killshot bot.
TL;DR
The Killshot bot streamlines crypto trading, but setting it up can be tricky for beginners. This guide covers creating a Killshot wallet, customizing buy buttons, adjusting slippage settings, and enabling auto-buy features. With these steps, you can optimize the bot for efficient and tailored crypto purchases, saving time and effort in your trading strategy.
Quick Step-by-Step FlowChart
For those looking for a quick overview, here’s a step-by-step flowchart that outlines the entire process at a glance.
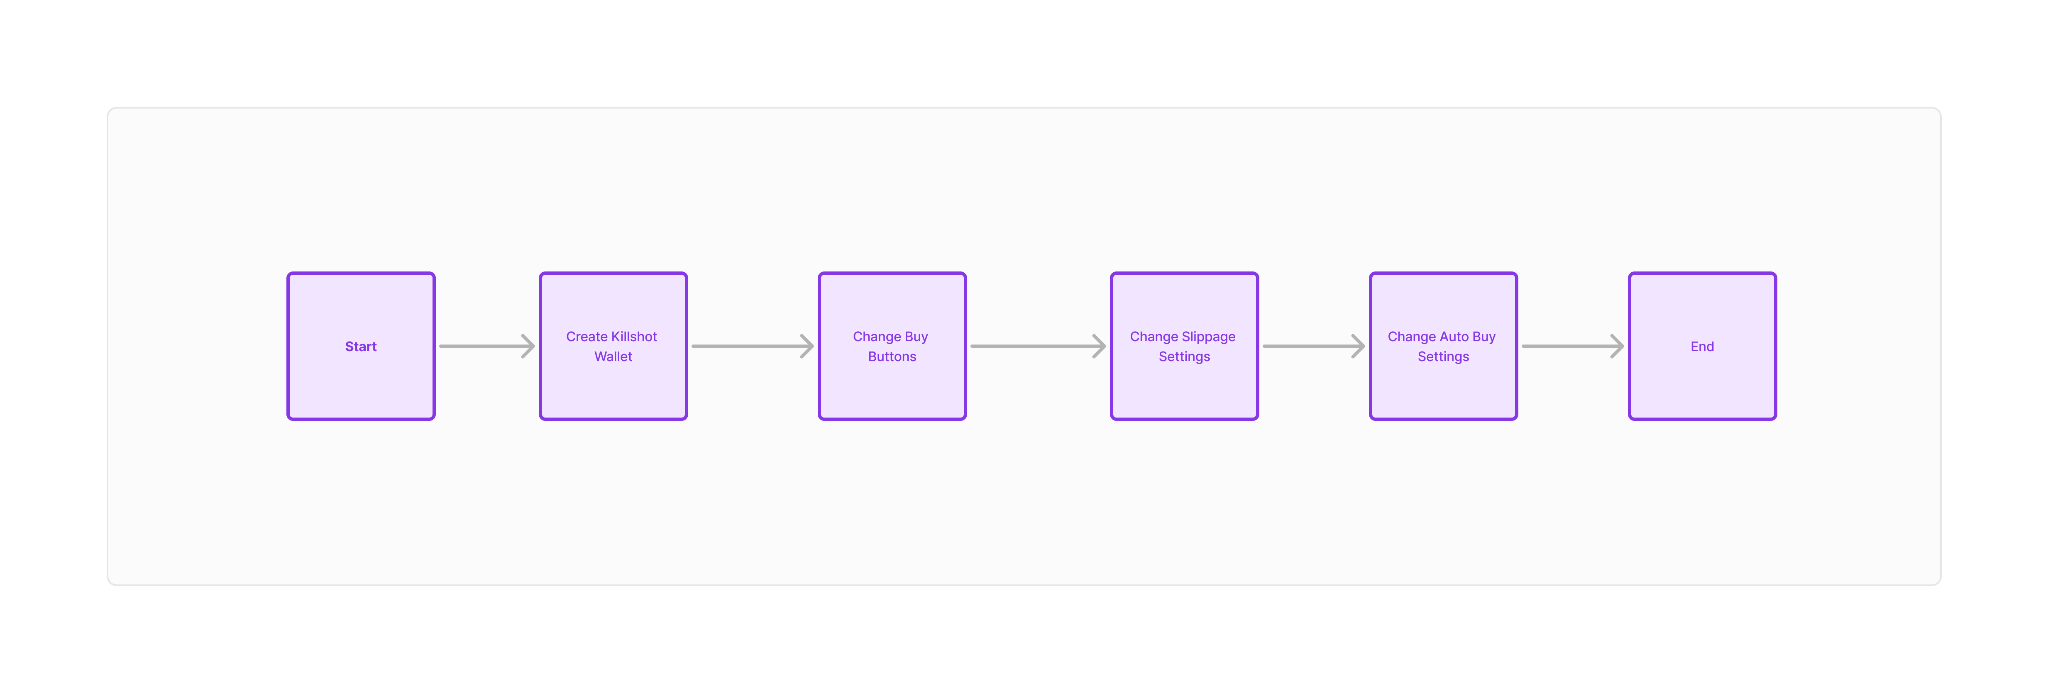
Here are the topics we’ll cover today.
- Creating a Killshot wallet
- Changing the buy buttons
- Changing the slippage settings
- Changing the Auto Buy settings
With that said, let's start.
Step 1: Creating a Killshot Wallet
Creating a Killshot wallet is quite simple. Here’s what you need to do.
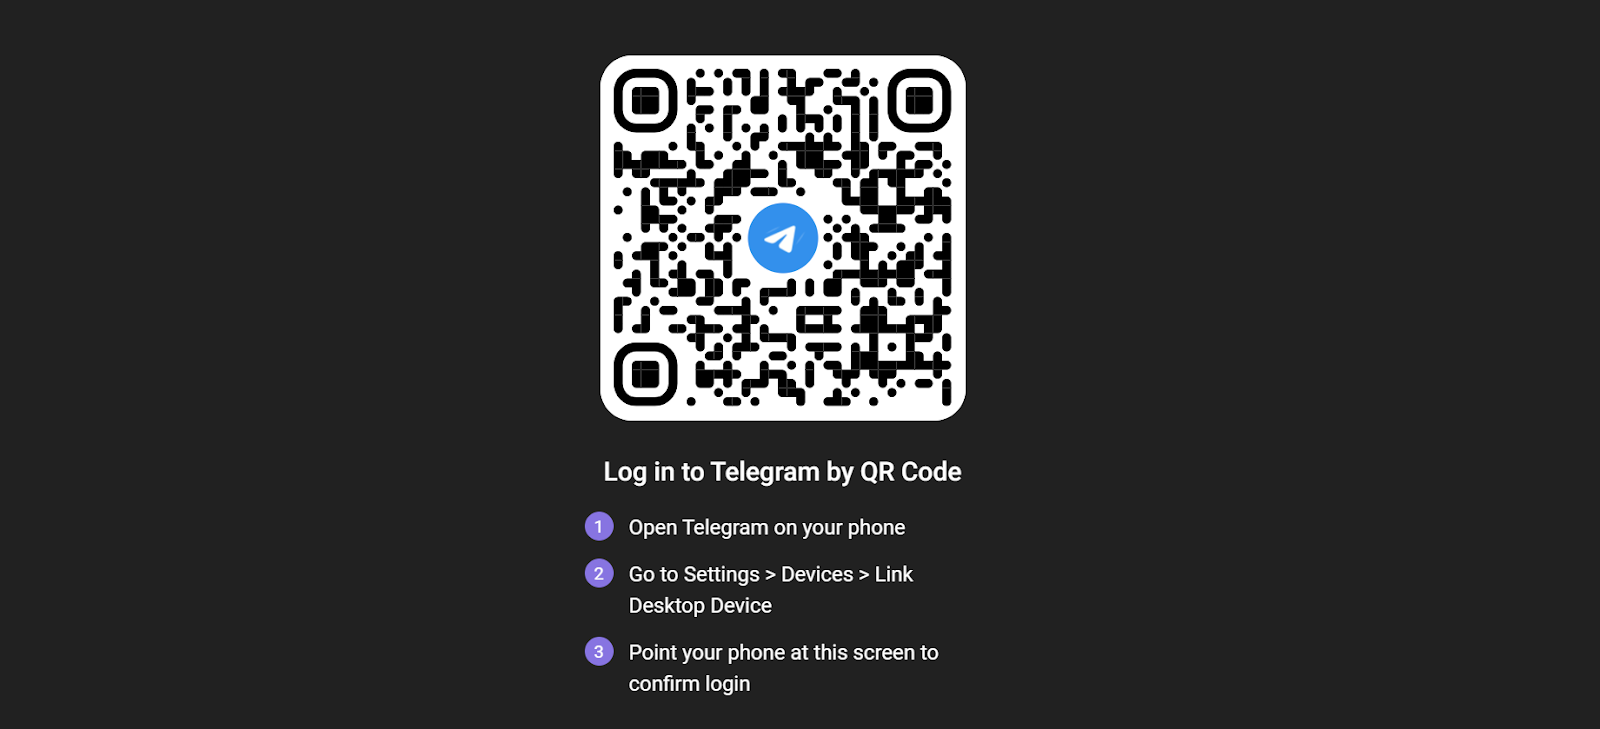
- Start by going to Telegram Web and scan the QR code on the screen.
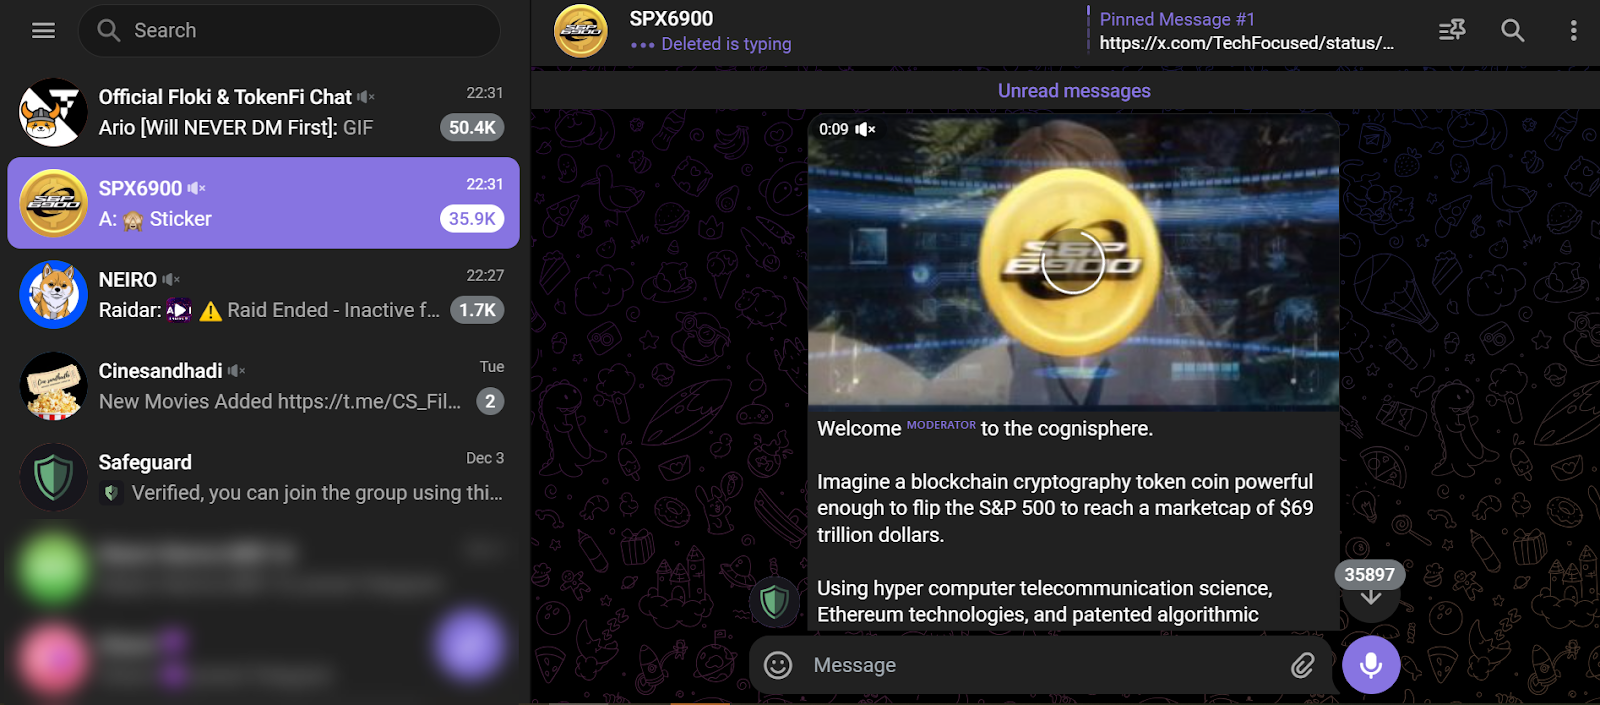
- Once you’ve successfully logged in, you’ll see all of your chats.
- Start the process by visiting the “Killshot” website.
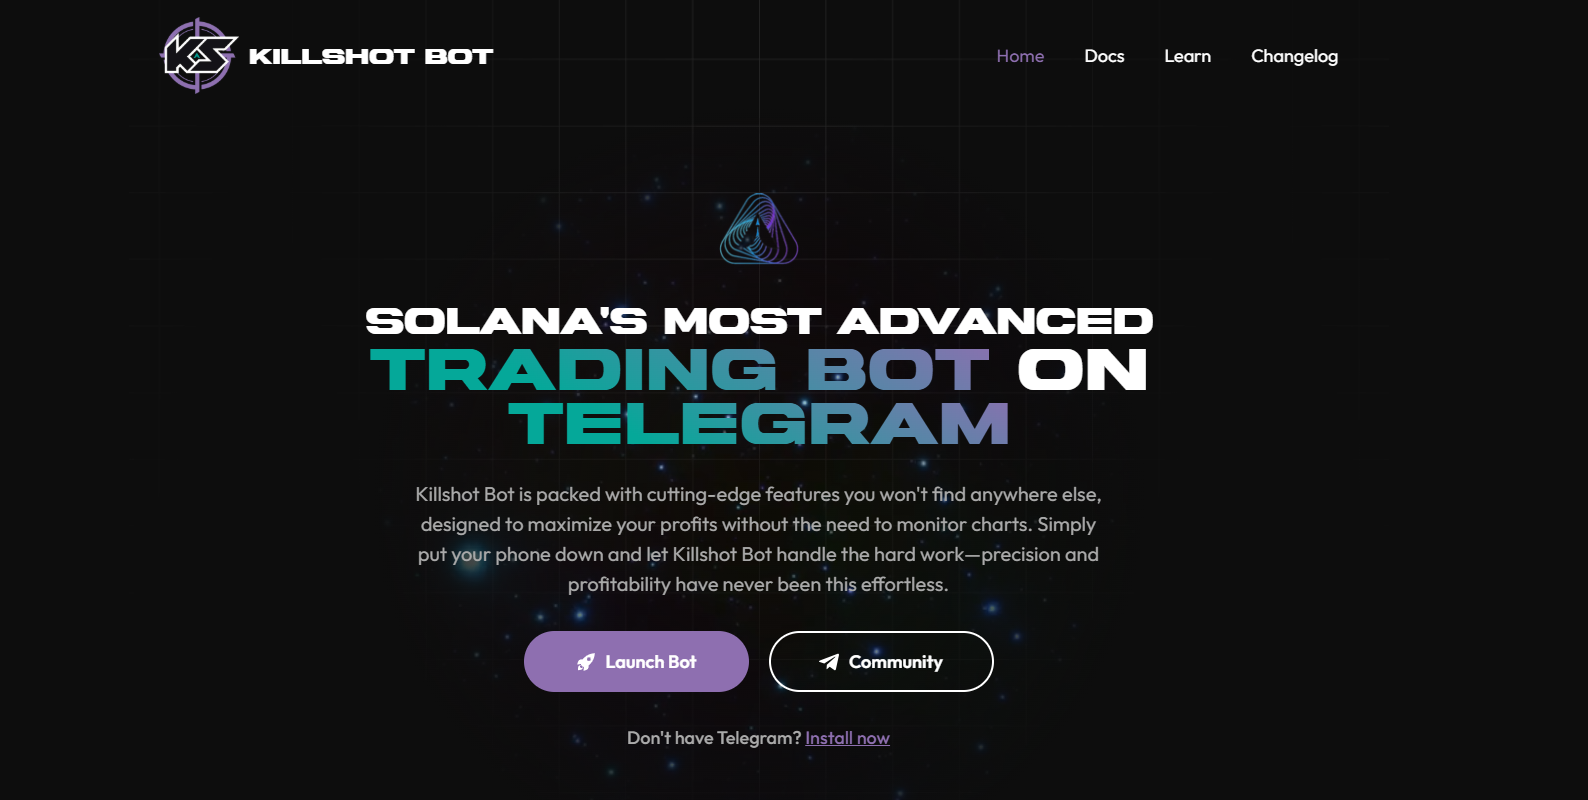
- Next, click on the “Launch Bot” button.

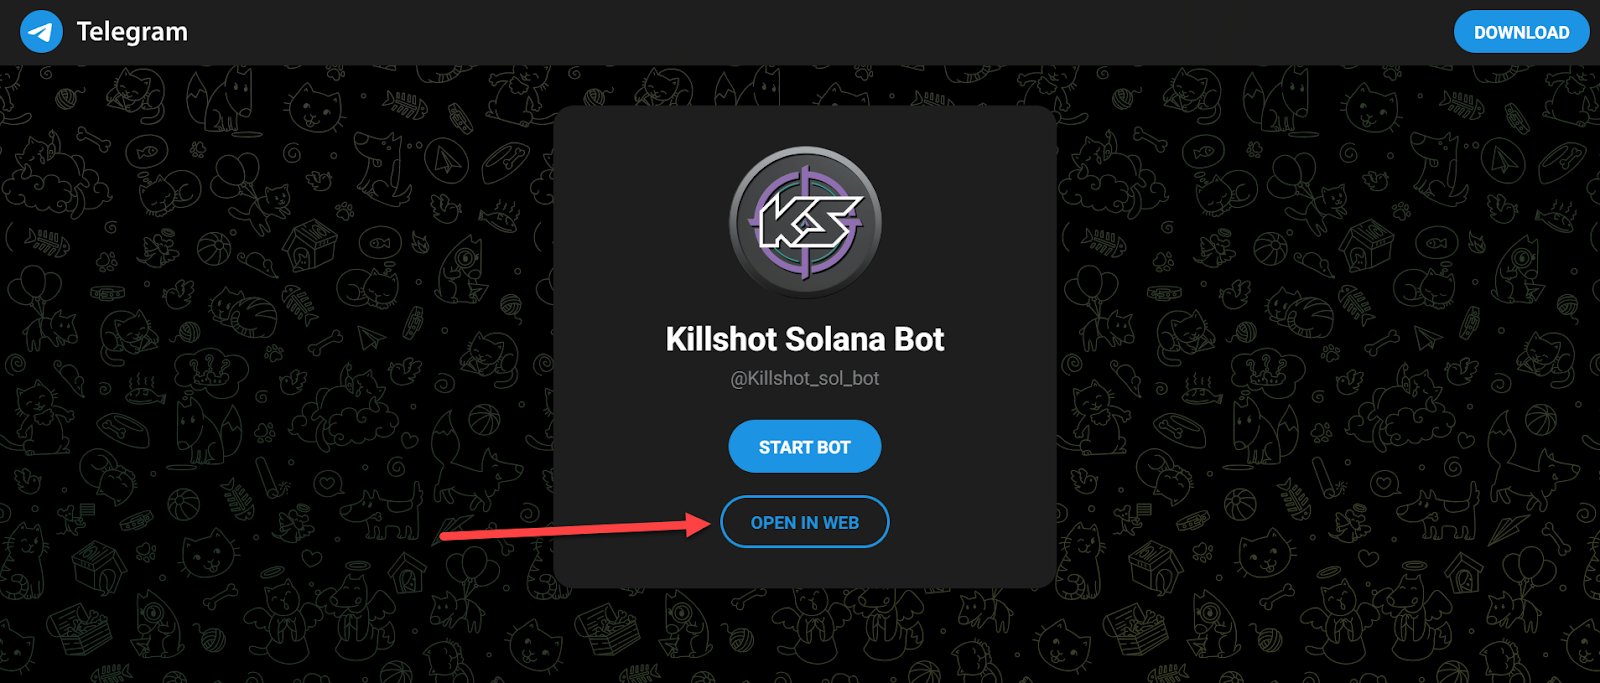
- You’ll be redirected to a different page. Click on the “OPEN IN WEB” button.
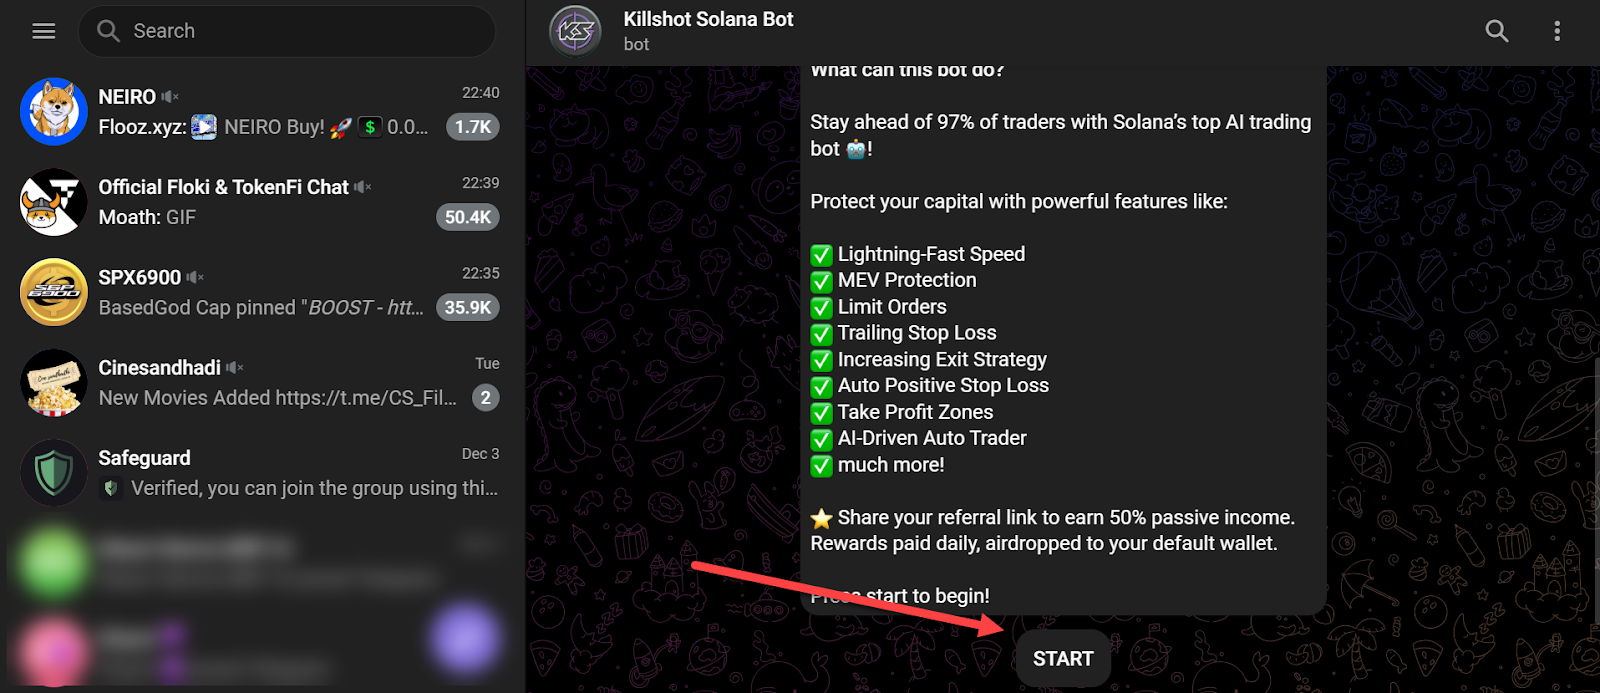
- Click on the “START” button.
- And voilà, your wallet is ready.
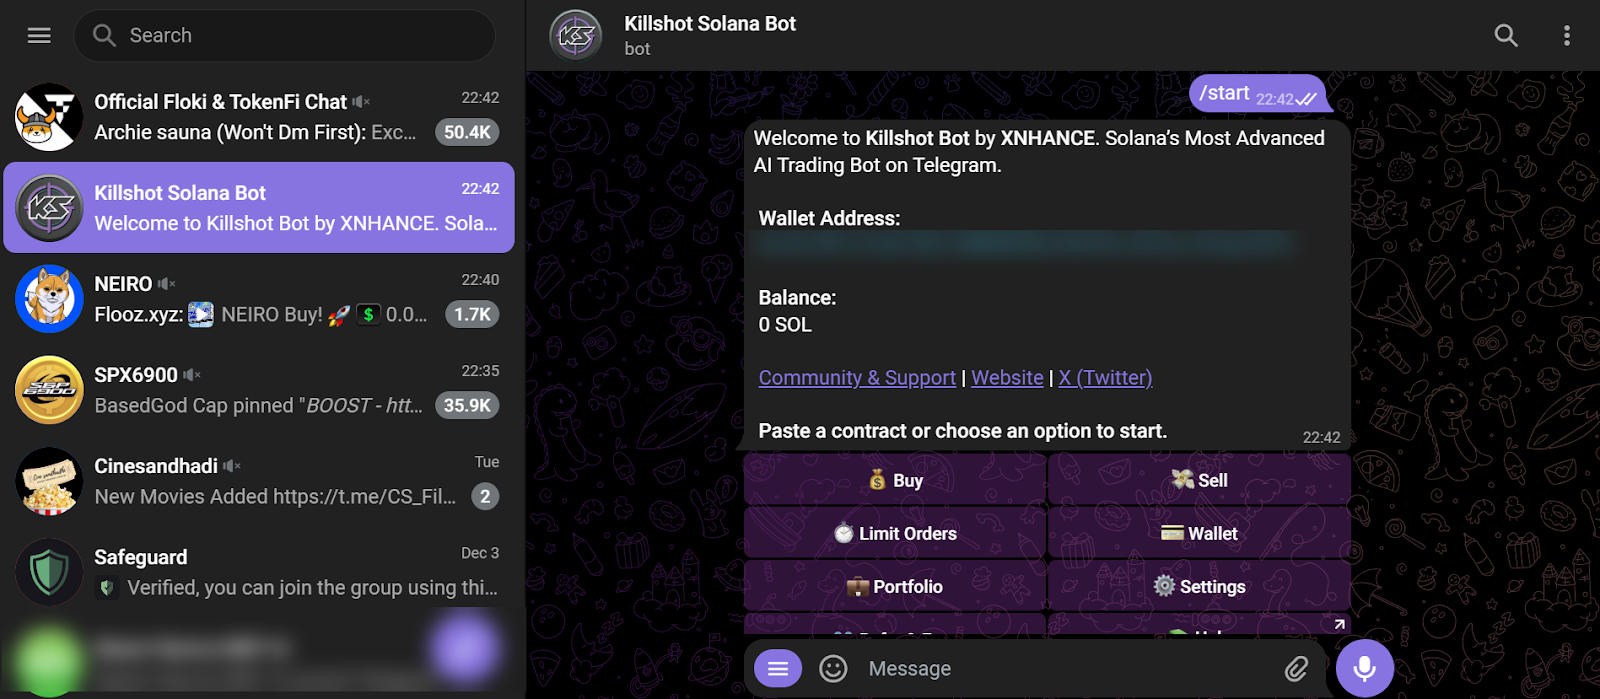
Now, you can start automating the process of buying and selling, all through this wallet.
Step 2: Changing the Buy Buttons
Now that your wallet is ready, you first need to change the buy setting according to your liking.
- Open your Killshot Wallet on Telegram.

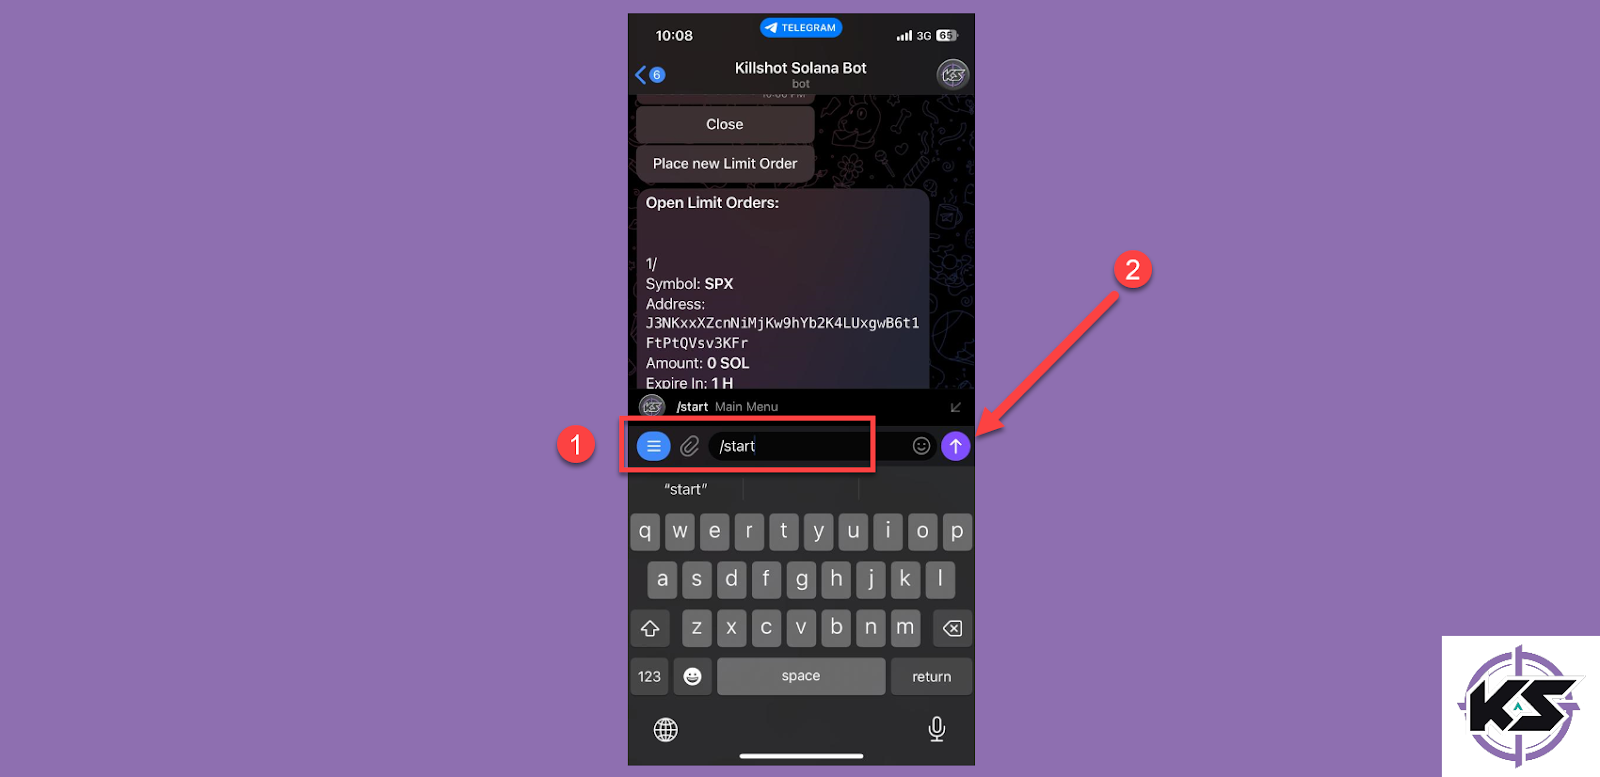
- Now, type in “/start” and press send.
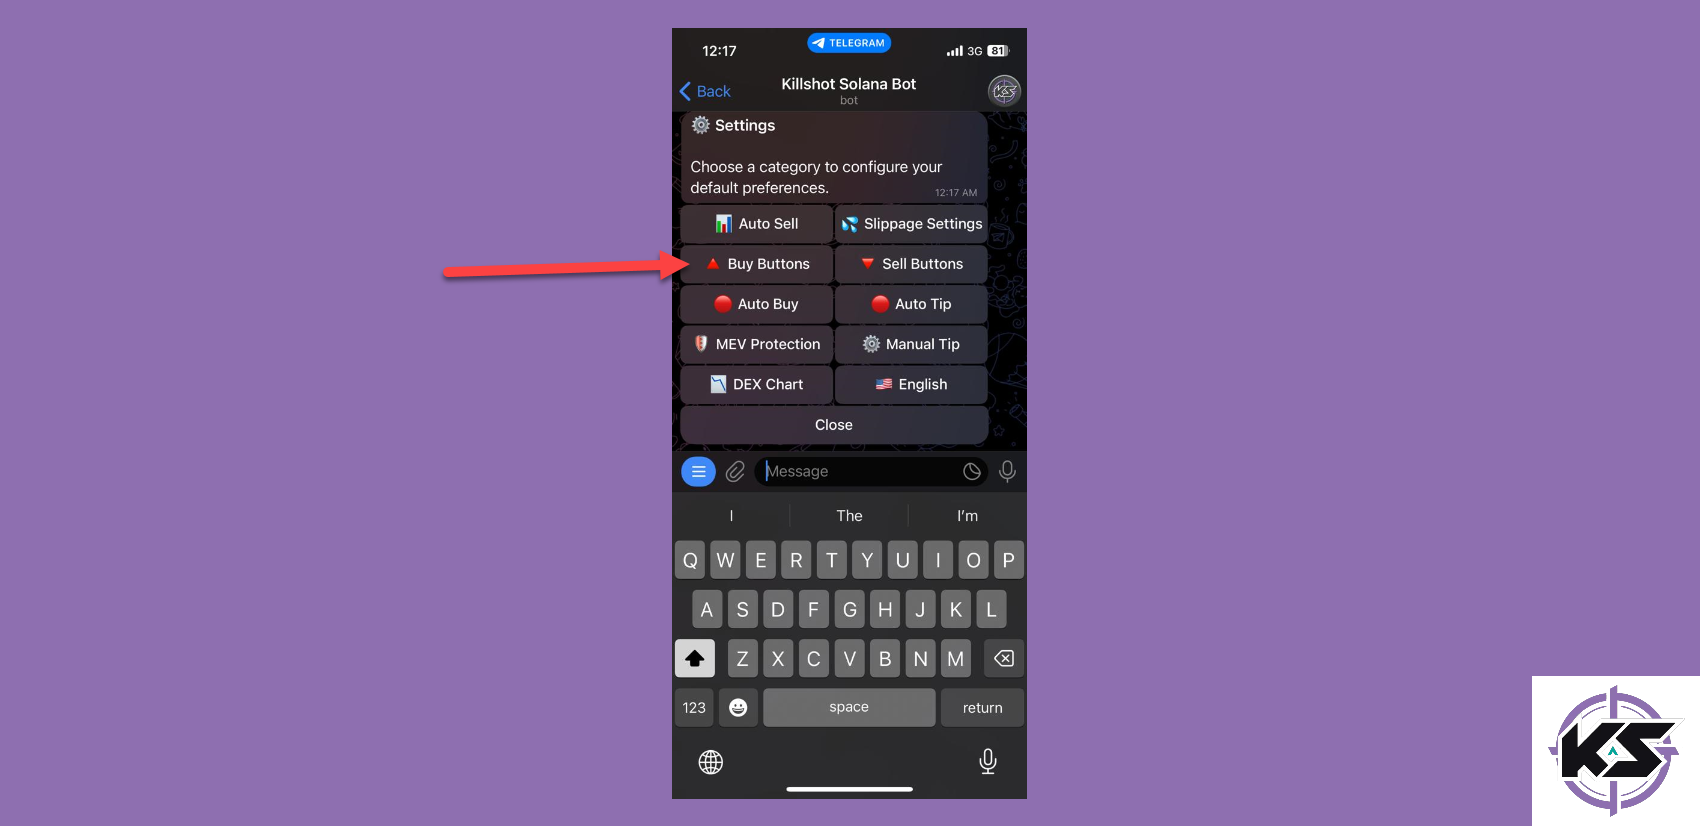
- After that, tap on the “Settings” option.

- Next, tap on the “Buy Buttons” option.
- Tap on the button, enter the custom price, and press send.
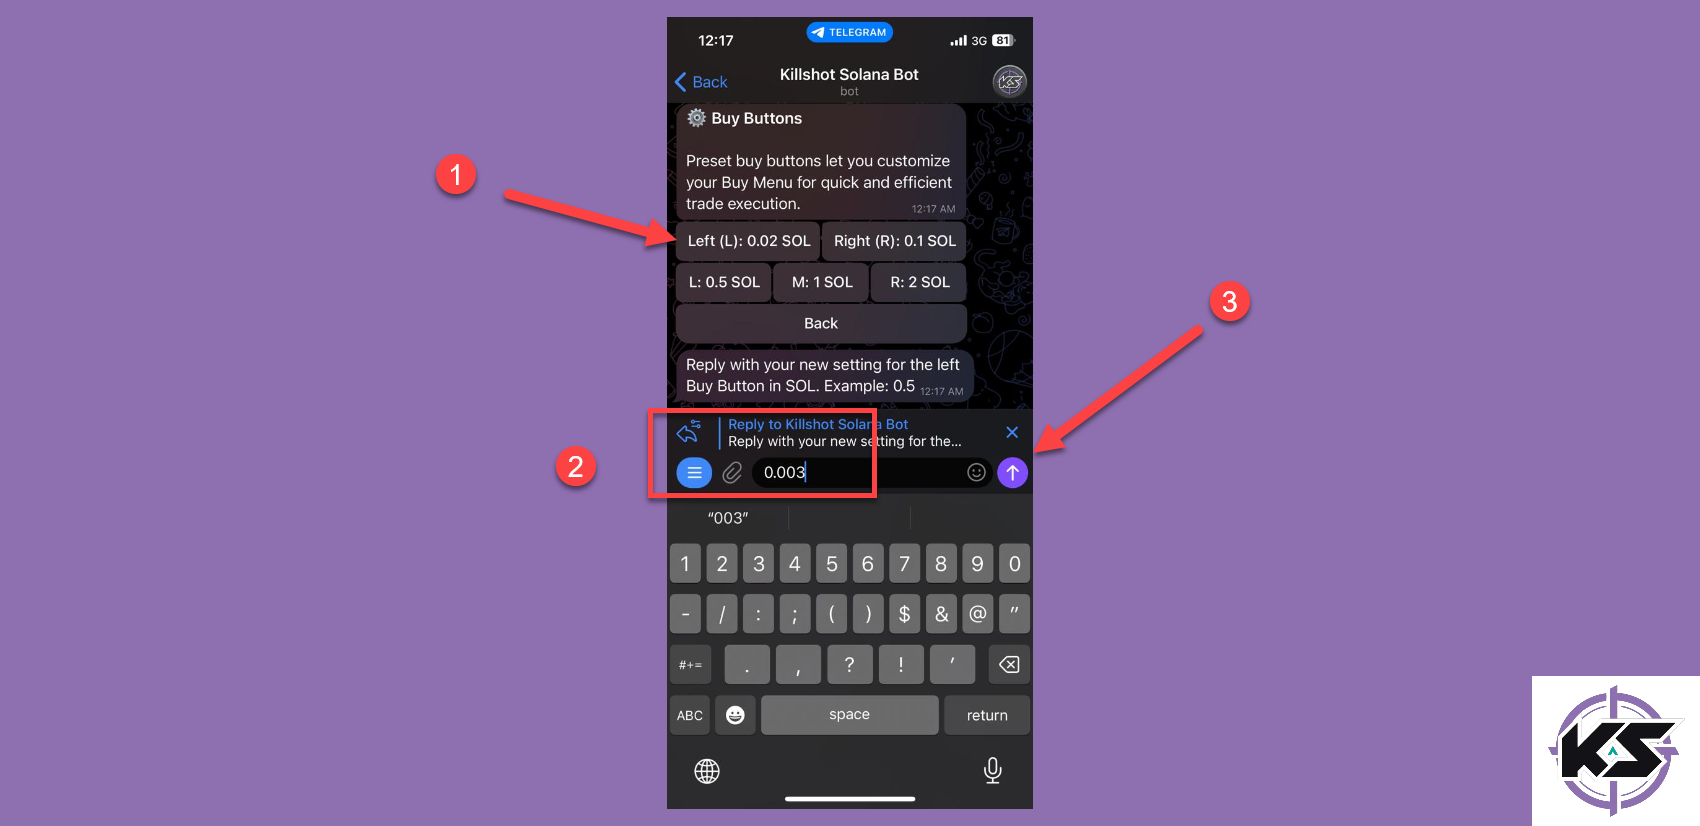
Now, when you buy a coin, you will already have preset buttons for spending SOL.
Step 3: Changing the Slippage Settings
The next thing you can adjust in your buy settings is the slippage.
- Start by typing “/settings” and pressing send.
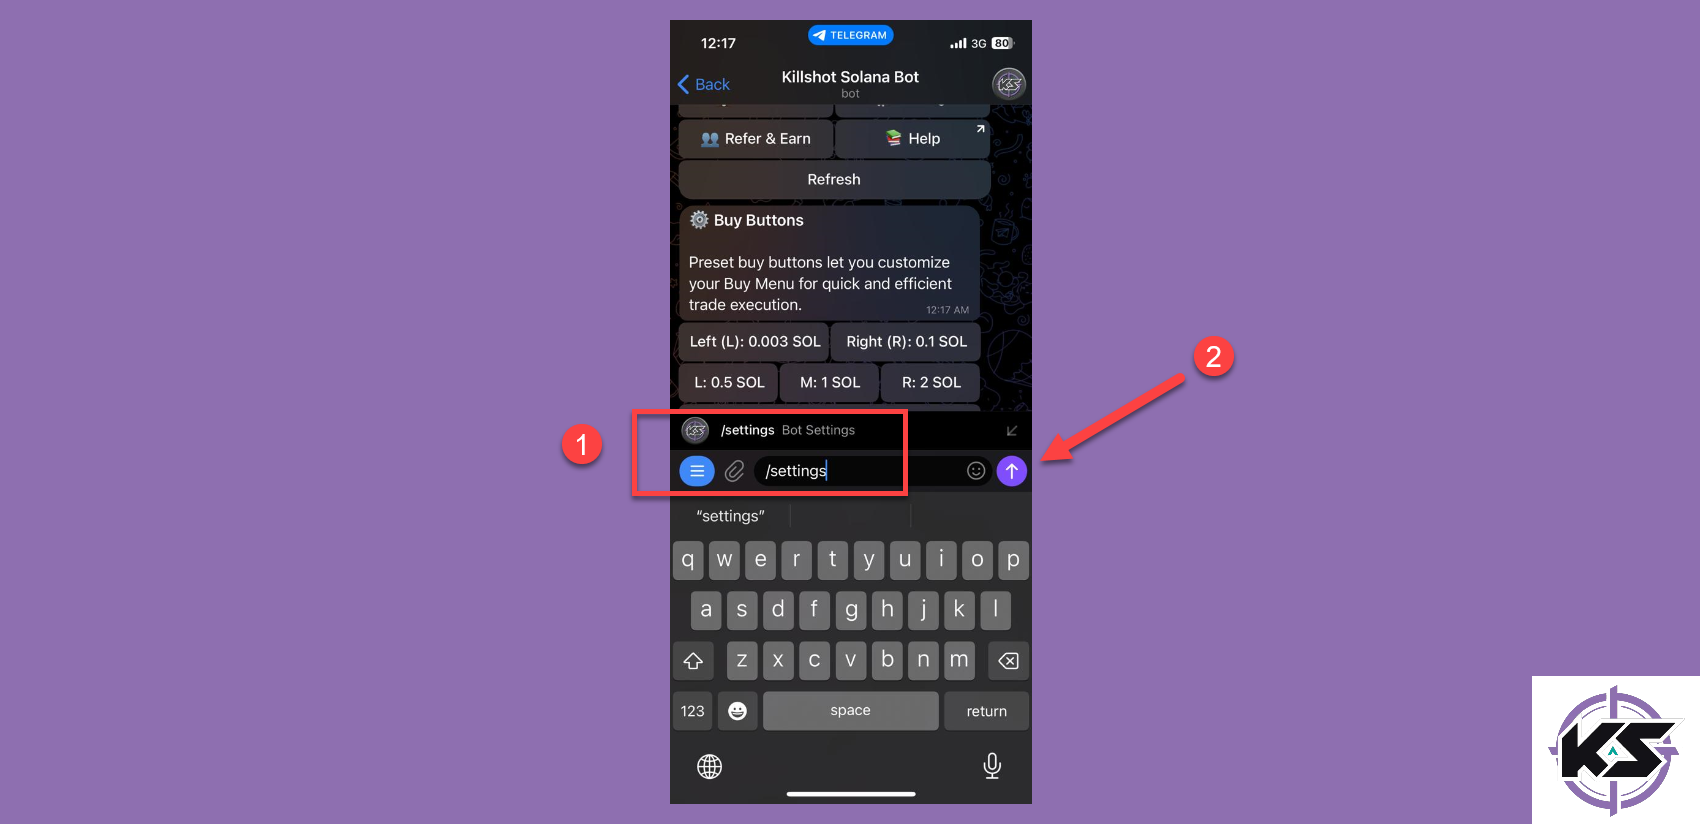
- Now, tap on the “Slippage Settings” option.

- Here, you can adjust the buy slippage options.
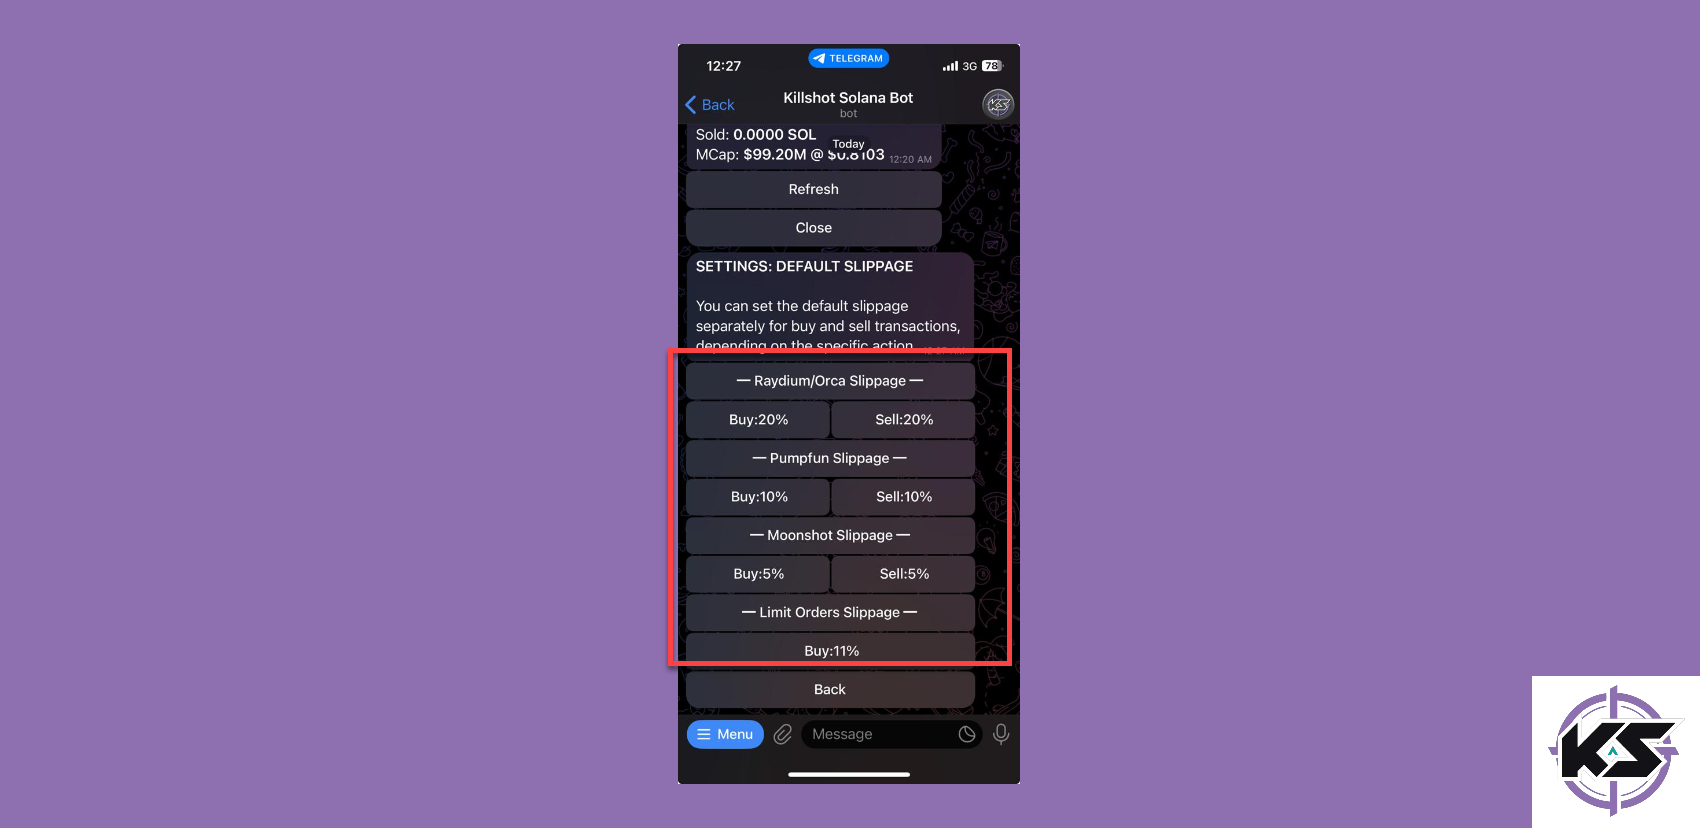
- Tap on the “Buy” option to enter the custom slippage and press send.
Note: Make sure to enter the custom slippage between 1 and 99.
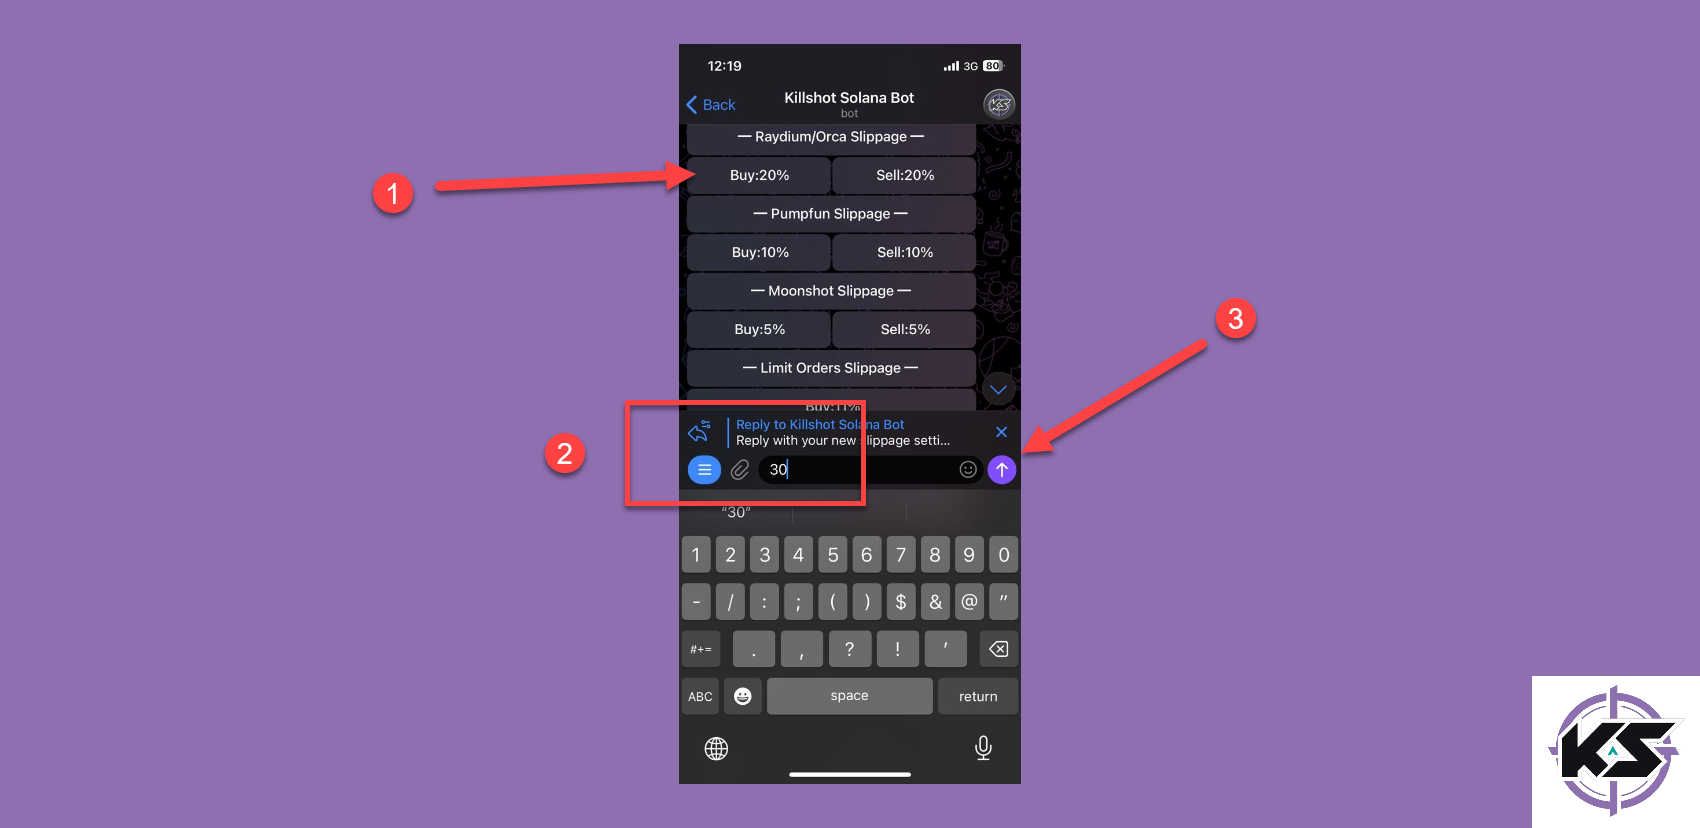
After that, you can set custom slippage for different Dexscreener or Limit Orders.
Step 4: Changing the Auto Buy Settings
In the settings section of the Killshot bot, you can also adjust the auto-buy settings. This feature is useful if you want to buy a token instantly without having to constantly change the parameters.
To change the auto buy settings, here are the steps you need to follow.
- Start by typing “/settings” and pressing send.

- Now, tap on the “Auto Buy” option.
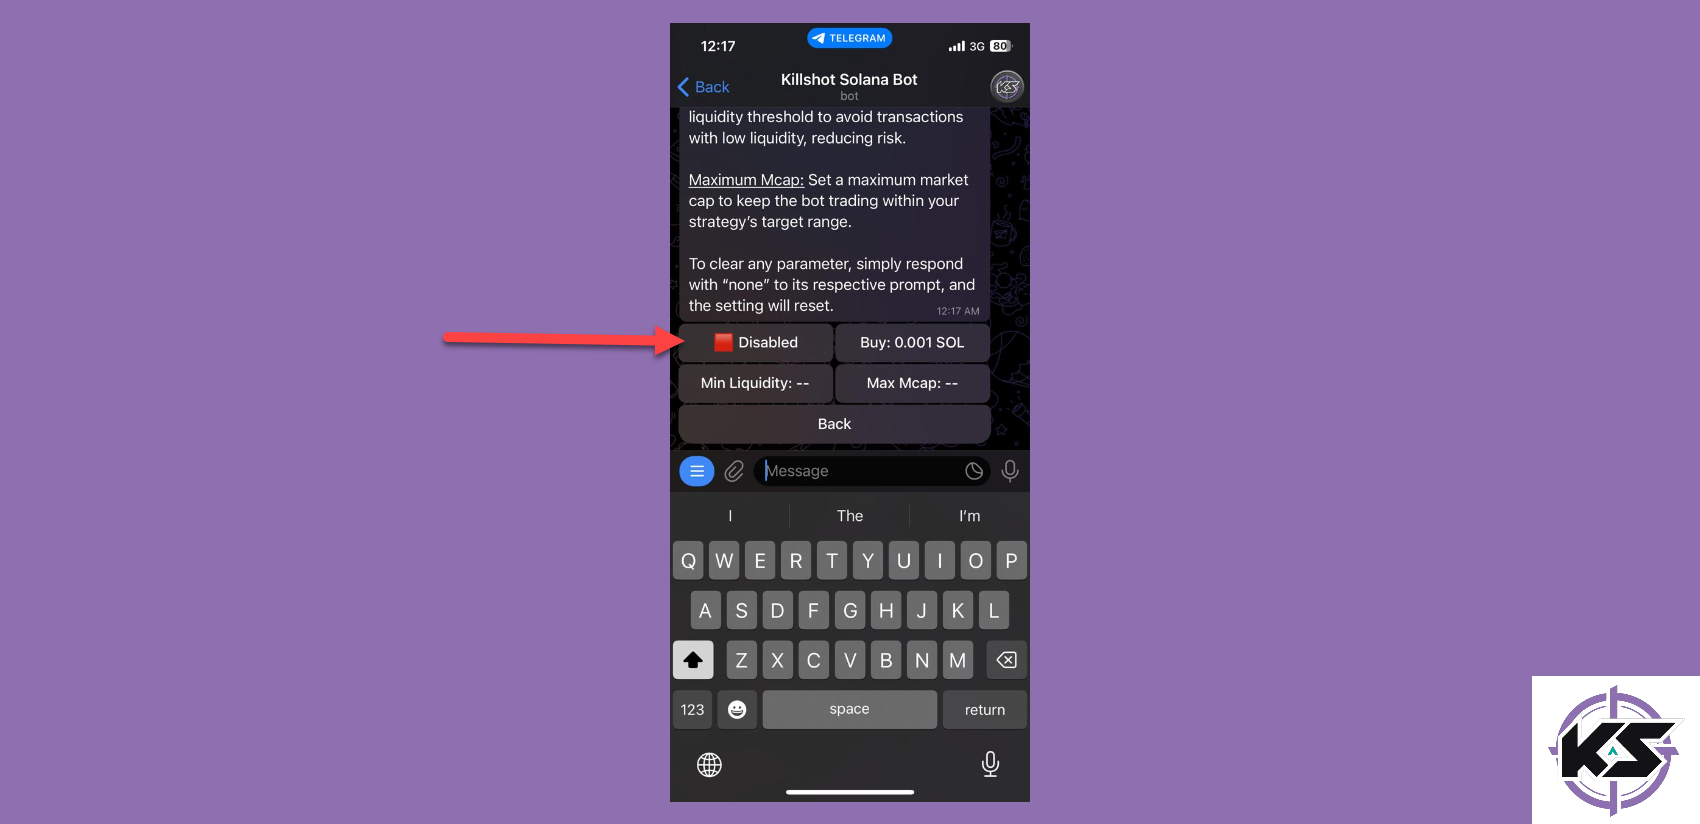
- If the option in the top-left corner shows “Disabled,” tap it to switch it to “Enabled.”

- After that, tap on the buy option to enter the amount of SOL you want to spend and press send.
Note: You can set the minimum liquidity and the maximum market cap for the coin.

Now, all you have to do is paste the contract address for the token, and the Killshot bot will instantly buy it.
Wrapping Up
Congratulations! You’ve now mastered the essential steps to change the buy settings for the Killshot bot. From creating a Killshot wallet to customizing buy buttons, slippage settings, and auto-buy parameters, this guide has covered everything you need to streamline your crypto-purchasing process.
By fine-tuning these settings, you can maximize efficiency, reduce manual effort, and tailor the bot’s performance to your specific trading strategies. Whether you're a seasoned trader or just starting your journey in the crypto world, the Killshot bot is a powerful tool to help you stay ahead. Now it’s time to put this knowledge into action and let the Killshot bot do the heavy lifting.


.svg)

.svg)